Posted on

Meet the team: Sandra

As promised, this week, you’re in for a double dose of team Sewisfaction and up next is in some ways, the face of the brand. If you’ve been to our bricks and mortar store over in Wokingham then there are two smiling faces that will be there to meet you and one of them is the lovely Sandra (more on the other smiling face soon).

With a background in interiors, Sandra seems to have always been around fabric and more often than not, you’ll hear her commenting on what a lovely cushion our new in fabric would make. However we’re on a mission to make a dressmaker out of her yet so we sat down to ask her all about what that looks like in 2019.

Tell us a bit about you? 

I have lived in Wokingham for over 50 years and one day, I’d really love to live by the sea. I have a husband called Mike, and two lovely girls – Natasha & Claudia, plus a very naughty cocker spaniel called Zak. I love interior design and am looking forward to getting stuck into my new hobby, dressmaking .

What’s your role at Sewisfaction?

My main role in Sewisfaction is customer service, which covers a lot of the online orders preparation & posting as well as helping customers in the shop with their purchases and queries.

Tell us a bit about your Christmas make?

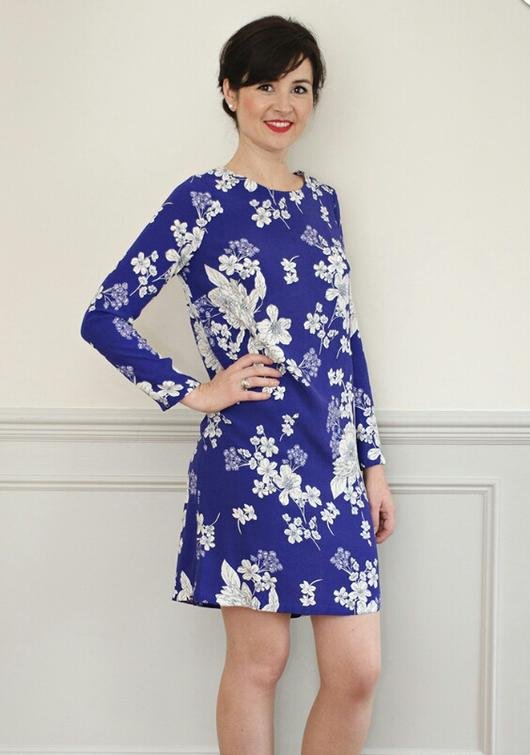
My Christmas make is my Betty dress, in this lovely black and white polka dot stretch cotton from Sewisfaction of course. It has an amazing skirt and a cute fitted bodice, I shall be wearing it Christmas Day with a red cardi. I decided to make the Betty at our ‘dressmaking for beginners’ course which I attended this year and I learnt many new techniques including. zips and darts. I might make a new version in a lighter weight cotton for the summer.

What’s next in your sewing queue?

My next make will definitely be a Tilly & the buttons Bettine dress – I actually already have it all cut out just waiting to be sewn up – I’ll be using a cotton fabric ready for the warmer months and I can see me wearing this when it gets warmer –  great for work. Once I have mastered this, I’ll definitely be making lots more in Sewisfaction fabrics.

Favourite Christmas food?

My favourite food, other than Christmas dinner is stollen – I must admit I have eaten a packet of it already!

Tipple of choice?

This year we’ll be trying the ‘Hugo’ cocktails which are made up of Gin, Prosecco, elderflower cordial, mint lime wedge & lots of ice.

Any sewing New Years resolutions?

I’d really like to get to grips with jersey as it’s comfortable to wear and I constantly see such beautiful jersey fabrics in our shop so that’s my main motivation.

So that’s Sandra everyone and doesn’t she look amazing in her very first dress? Plus trust us, this interview doesn’t even begin to show just how sweet she is – if  you’re ever in the area, make sure you pop in and say hi, she’s the best!

Posted on

Meet the Team: Suzy

This Festive season, we’ve decided a meet and greet with the Sewisfaction team is well overdue, so we’ve asked the girls to put on their best me made party dresses whilst they sit down and answer some questions for us.

First up this week is Suzy, sister-in-law extraordinaire to the lovely Sheona, in her Deer and Doe Belladone dress.

So Suzy, start by telling us a little more about you?

Hi Everyone! I’m Suzy, Sheona’s sister-in-law (Sheona is married to my younger brother). I am married with 3 kids. I am fortunate enough to work from home part-time, which means I can also spend some time in Sewisfaction. As well as sewing I also enjoy crochet, cooking, reading, travelling, listening to podcasts and getting together with family and friends.

What’s your role at Sewisfaction?
All sorts really! Officially I work part-time as Class Coordinator,  but generally I help out whenever Sheona needs an extra pair of hands, which could be packing orders or working in the shop. Usually if I’m doing Class Admin I work a morning a week making sure everything is in order for our classes and then extra as and when I can help.
Tell us a little bit about your Christmas make? 
This Christmas I will be wearing my Deer & Doe Belladone dress that I made using the gorgeous Rosabella Jacquard from Sewisfaction (of course). It’s a versatile, classic, little black number that I can wear to any event over the Christmas season.
I was in a bit of a hurry when I made it and I regret leaving out the lovely detail that the pattern gives you on the back but, as I love wearing it with a silver bolero, (as I am always cold) you wouldn’t see the detail anyway. I really love shape of this dress it as it nips me in at the waist and gently flares out, but is not too flouncy. Oh and how could I forget …. the pockets!
What’s next in your sewing queue?
If I get time (and it may be a big ‘if’), I am planning to make a wrap dress in our gorgeous petrol Luxe Stretch Velvet to wear for Christmas day. After stroking it in the shop I just couldn’t resist it.
Favourite Christmas food?
Its got to be all the goodies, the mince pies, stollen, panetone and the tub of Cadbury’s Heroes!
Tipple of choice?
Cointreau! And, I hate to sound old but …  I also like a Sherry when I am prepping for Christmas (I think it reminds me of my Nana).
Any sewing New Years resolutions? 
1. Try and be more thoughtful in what I sew. Get less distracted by patterns I won’t wear often or fabrics that, although I love, I won’t get as much wear out of. I have realised I tend to wear plainer or smaller prints more often.
2. Take my time. Instead of rushing in because I’m in a hurry or excited to get started, make time to check the pattern against my measurements /bodice block to make sure it will fit me. Make pattern adjustments before I cut out. It’s so worth it and far less painful that adjusting it later.
So there you have it everything you need to know from Suzy over here at team Sewisfaction -isn’t she just lovely? We’re lucky to have such an amazing team, so look out on the blog over the next few weeks for an intro from us all.
Posted on

Christmas party Velvet Luxe from Sew Manju

Hi Everyone,

I’m Manju and I blog over at https://sewmanju.com/ you can also find me on Instagram @Sewmanju.

I was honoured when Sheona reached out to ask me if I would consider doing a guest post for Sewisfaction. I have admired the way that Sheona has worked so hard building the business up and it didn’t take much for me to say yes.

I dithered a fair bit over what to select, but, with Christmas fast approaching, I finally settled on 3 metres of the luxe stretch velvet in navy (but it’s available in 4 other colourways too). This fabric is perfect for sewing a festive-holiday dress. It’s washable, it’s warm and cosy, it’s a perfect weight so skims over any body imperfections, it stretches so is very comfortable and the fabric feels luxurious and rich.

I chose to pair my fabric with the Pauline Alice Aldaia dress pattern, which I have made twice before (search my blog to see what modifications I made), but essentially, the only changes made to this version (from the original pattern) were minor: lengthening and slimming down of the sleeves, shortening the neck band by 1.5 inches for a snug, no-gape fit, and lengthening the skirt by 2 inches. Truthfully, I could perhaps have stood to do a very small full bust adjustment (maybe like 0.25 inches), but it’s still a great fit.

Some things you should be aware of if you chose to make up this pattern, particularly the view that I made with the 6-gore skirt:

  • The shape of the skirt panels, coupled with the fact that velvet has a nap which means that all the pieces need to be cut with the nap running in the same direction, means that you will need to order a little extra fabric. I was kind enough to be provided with 3 metres of fabric and to be honest I used almost all of it, because of the directional cutting that was required.
  • Make sure to stabilise the waist. The instructions don’t tell you to do that, and I found on my first version of this dress that the waist stretched out because I omitted that step. That skirt is heavy! I used clear elastic to stabilise and also applied the same to the shoulders.

Back to the velvet: this fabric pre-washed, cut, sewed and pressed (with care!) well. I used a medium setting on my iron, steam, and a light hand to press and used my silk organza press cloth to protect the fabric when pressing from the right side.

As mentioned above, velvet has a nap and I chose to cut my fabric with the nap running upwards; so that the fabric feels rough when brushed downwards. I found that cutting the fabric in this orientation produced a richer looking dress.

I used a combination of my sewing machine and overlocker to construct this dress. I used my machine for more control over fiddly parts, like basting the neck and sleeve bands in place before overlocking, but just used my overlocker for things like sewing up the skirt panels and setting in the sleeves. On my sewing machine I used my stretch stitch (the one that looks like a lightning bolt) and a universal needle. I used a Schmetz 2.5 stretch twin needle to topstitch the neck band and the hem. I found I needed to topstitch the neckband to stop it from collapsing.

I worked on this dress over a period of a week, on and off, but if you had a good stretch of time I reckon you could easily complete it within a day. The pattern is becoming my go-to for knit dresses; I just love all the different options and the neck band gives a beautiful fit and finish. The fixed wrap bodice is flattering, coupled with the flared skirt, and there’s no fear of anything coming untied or undone. In short, I love this dress and it’s made such a welcome addition to my wardrobe.

Happy Christmas everyone!


Posted on

Top five sewing patterns for beginners

Taking the first step to sewing your very own me-made workshop can sometimes be confusing. There are so many patterns out there from the independent brands as well as the ‘big’ and ‘scary’ top four. So if you’re thinking of taking the leap and joining the community, never fear, we have your back. Read on for our top five beginner patterns.

1. Tilly and the Buttons – Cleo

Great for: Easy to follow instructions

Sew in: Woven fabrics, including denim, cord or even upholstery fabrics

Cleo is our go-to pattern for all seasons, from cosy corduroys and knits in the winter to denim layered over t-shirts in the summer.  We love Tilly’s patterns for a range of reasons, from the simple to follow instructions to the easy to use measuring charts; you really can’t go wrong. This on trend, style has no fiddly zips or buttons to contend with and the dungaree clips are super simple to use, in fact, the only difficult thing about this pattern is choosing how many versions to make!

2. Grainline Studios – Scout Tee

Great for: A quick, simple sew

Sew in: Lightweight to medium fabrics including cotton lawn, linen and denim

Sometimes it’s hard to believe the perfect top exists, but we think the scout tee comes pretty close. A great, quick sew, this top has no darts or pleats but does show you how to handle bias binding on the flattering neckline. This top is one that suits all body shapes, which we love and can be made again and again in so many different prints and colours that your closet will be packed with them before you know it!


3. Leisl & Co – Everyday Skirt

Great for: A well-drafted, wardrobe staple

Sew in: Medium weight cotton, needlecord or flannel

We LOVE the everyday skirt – so many variations, so little time. This A-line, classic shape has a flat front, with elasticated back, which sits perfectly on the hips of any body shape. There are no zips and fastenings which is great, but you can get to grips with adding pockets (who doesn’t love pockets) and also adding elastic to a garment. This is sophisticated, simple sew which you’ll be swishing around in forever.

4. Tilly And The Buttons – Coco

Great for: Getting to grips with sewing jersey

Sew in: Medium weight jersey including Ponte Roma or double knit

Another favourite from Tilly And The buttons, the Coco is the ultimate jersey top AND dress all in one pretty package. Crying out to be sewn in a classic Breton stripe, the super clear instructions strike again, not only that, the handy guide shows beginners how to sew stretch without the use of an overlocker if you aren’t quite ready to take that leap just yet. Sewing with jersey may seem scary, but this will most definitely help you along on your ‘jersey journey’ – thanks Tilly!

Sew Over It - Ultimate Shift Dress

5. Sew Over It – The Ultimate Shift dress

Great for: A simple dress with lots of variations

Sew in: Cotton, viscose or crepe

Last, but by no means least, the ultimate shift dress is a wonderland of sewspiration, from the long-sleeves to short, ruffled ones and even a top variation – it really does have something for everyone. Again, there are no zips but this pattern will help you to get to grips with bust darts and neck facings, in a simple, easy to follow way. This one is great for showcasing bold prints and if you feel like ‘stepping it up’, try stitching something in drapier fabrics for a challenge.

So there you have it, our top five patterns for beginner sewists, we love the variation of all of these and the great thing is, you can add your own flare once you really get going on your sewing journey.

Ready to begin but still a bit overwhelmed? Don’t panic, we’ve covered all basis, check out our gorgeous kits for each of the patterns which contain everything but the sewing machine! From a perfectly paired Cleo/stripe combo to dreamy denim ready to be made into dungarees, we have plenty to choose from, so what are you waiting for? Shop the kits here.

To see Sheona talk in more detail about her favourite beginner patterns watch the vlog below:

Posted on

Agnes Batwing Hack Tutorial

Hi Guys, here is another post that’s been moved over from the old SewSheSho blog. A few years ago I wrote a tutorial on hacking the Tilly & The Buttons Agnes pattern into a batwing top. It was one of the most read posts on the old blog so it would be a shame to lose it, and with One Week, One Pattern coming up it would be a great pattern choice! Excuse the old, indoor photos! 

Since my last post on Agnes many moons ago, a few of you have asked for a post on how I made my bat wing version. It was a bit of a trial and error experiment and luckily it seemed to come out fairly well. I’ll try and show you how I did it, but feel free to let me know if you have an easier way! You could use any fitted bodice pattern, or draft your own. I’ve used Agnes as for me it’s a great fit and a really versatile pattern.

tilly and the buttons agnes hack tutorial

First take the Agnes front bodice piece and flip it over so the markings are on the bottom. Next, draw round this piece onto your pattern paper so that the centre fold is on the left of your paper, like so. Mark this piece with an F so you know it’s the front.

tilly and the buttons agnes hack tutorial

Now take the back bodice piece and lay it on it’s side so that the centre fold is on the bottom of your pattern paper and the waist curve crosses the waist curve on your front piece, as below. Draw round this piece and mark with a B.

tilly and the buttons agnes hack tutorial

You should now have both bodice pieces overlapping at 90 degrees. Draw a line between the outer shoulder point on both your F & B pieces, this is shown below in blue. You now need to take two measurements; First measure from your shoulder point to your wrist (or to wherever you want your sleeve to finish.) We’ll use 30″ for this example. You need to draw this measurement from the blue line out towards the edge of the paper. This is the green line below. To make sure you get it exactly central, draw the green line all the way across the bodices, ensuring it crosses at the point where the waists meet, as below. It’s important to remember that your shoulder to wrist measurement (30″ here) needs to be past the blue line, the rest of the green line is to ensure it’s centred correctly.

Secondly, measure around your wrist and add any ease until it feels comfortable. For example, if your wrist is 7″ and you want to add 1″ ease for comfort then your figure is 8″. Note, as you’re using jersey with stretch, you don’t have to add ease if you want your sleeve to be fitted to your wrist. You need to double your figure as you have two wrists, so your wrist figure is 16″ in this example. You need to draw a line perpendicular to your green line which is your wrist figure. It’s shown below in red. Make sure the green line is at the centre of the red line, so in this case there is 8″ of red line either side of the green.

tilly and the buttons agnes hack tutorial

Join the wrist points to the shoulder point on both sides, shown below in blue. This will be your sleeve. Smooth out the shoulder and waist points by drawing slight curves where the sharp joins meet.

tilly and the buttons agnes hack tutorial

You now have two complete bodice pieces, but as they’re overlapping you’ll need to trace them on to new pieces of pattern paper as per below. Mark the grainline and any other markings you want to add.

tilly and the buttons agnes hack tutorial

You’ve now got a front and back bat wing pattern! Use the same construction method as you would with Agnes, join the shoulder/sleeve top seams first, add the neck band and then sew the side seams. Finish the sleeves and hem by folding over and using a double needle. If you find the pattern piece is too wide for your fabric as the sleeve is very long, you could cut your sleeve piece as the below blue line and add a seam allowance. This would allow you to put the sleeve elsewhere on your fabric when cutting. I chose just to run right to the edge of the fabric and bring in the sleeve.

tilly and the buttons agnes hack tutorial


When you try it on, you may find you want a little less volume in the sides, if so just take it in slightly to your personal taste.

IMG_4150

Hopefully this has been relatively easy to follow and it will come in useful to some of you! Please do let me know if you make your own batwing Agnes, and feel free to ask any questions in the comments below.


Posted on

Goldhawk Road Fabric Shopping Tips

I might own a fabric shop myself but it doesn’t mean I’m immune to the wonders of Goldhawk Road! I thought I’d just take five to tell you briefly about my last trip and give you some tips I’ve picked up on previous visits.

Goldhawk Road fabric, fabric shopping, Goldhawk fabric
I’m sure if you’re here reading this you’ll know all about the fabric mecca that is this little London street. Just in case you’ve not heard of it, it’s right next to Shepherds Bush market and of course Goldhawk Road tube.

There are approximately 10/15 fabric shops spread across both sides of the street and there are some amazing gems to be had. A lot of the shops have different products, some specialising in certain things like silks & lace but most with a wide range of fabrics. It really is a fabric lovers paradise!

Goldhawk Road, Goldhawk Road fabric, fabric shops, fabric shopping, Goldhawk fabrics
Goldhawk Road

Now I’ve visited a handful of times I thought I’d let you know some tips I hope you’ll find useful.

If you arrive by tube the main bulk of shops are on your right as you come out of the station. On my last visit we decided to drive up and used JustPark.com to find a space. This was brilliant for us as we drove in from Surrey in less than an hour and the space we rented was only one street away from Goldhawk Rd. This meant we didn’t have to lug all our many purchase back on the tube and train, and it was a lot cheaper! There are lots of sites where people rent their parking spaces so I’d recommend having a look.

Searching for fabric gems…

* I’ve only been on a weekend once and it was much busier than in the week. I know it’s not always possible but you’ll find it a lot less crowded and easier to see everything on a weekday.

*  Take your time to look around as many of the shops as you can before choosing where to go back and buy from. Some shops have the same fabric at vastly different prices, for example one shop had Liberty fleece for £18pm (£40pm from Liberty) and another had the exact same fleece in the same colourway for £10pm! I also picked up some Ponte de Roma for £8pm that was in another shop at £12pm.

Fabric house, scuba fabric, Goldhawk Road
Fabulous scuba from Fabric House

* Some of the shops often seem to have quite a lot of staff, and it’s quite common for them to follow you around whilst you are browsing. The first time I went it was quite off-putting but now I just smile and say hello. The shops are their livelihood and understandably they want to make sure no one is putting mucky fingers on their stock, plus they want a sale so are keen to be attentive! Take your time and don’t be put off asking questions, I’ve found almost everyone to be very friendly.

Fabric world, Goldhawk Road, Goldhawk Road guide
Checking out some Liberty in Fabric World

* It’s OK to haggle! Being a stereotypical Brit I never haggle but have tried the last couple of times after hearing other people do it and sometimes it does work! Always be polite and friendly and ask for a realistic discount, they’re not going to cut the price in half for you! I’ve done it when there’s been a fabric I quite liked but didn’t want to pay £10pm for, I offered £7pm and we agreed on £8pm. Also when I’ve bought large quantities I’ve asked for a discount – I got 4 metres of one fabric for £4pm instead of £4.50pm. You could also ask if you’ve seen it cheaper elsewhere, as long as you’re polite and respect if they say no then I don’t think anyone minds. Again I think this is likelier to work on a weekday when the shops are quieter.

Carry cash. A lot of the shops take card but there are still a few that don’t. There are cash machines by the Sainsbury and Tesco and possibly some further down.

If you’re anything like me and love a good rummage then make sure you don’t have a cumbersome handbag to lug around! Much easier to hunt down fabric bargains with your hands free!

* Be aware that a lot of the stock  is seconds, this means it could just be a print that the colour match was slightly different to their previous batch, or it could be a misprint or small snags etc. Make sure you take a good look at the fabric before it is cut and again, if there are any issues, use it as an opportunity to haggle.

Oh and if you need the loo, there’s a Costa on the corner by the tube station. You’ll need to buy something to get the code for the door.

There are too many shops to mention individually (isn’t it wonderful!) but a few of my favourites are;

Fabric House, second or third one down from the market. The owner is always really friendly, the stock is super cheap and I’ve picked up some real gems especially jersey and scuba.

Classic Textiles, next to Fabric House. They have a great selection of Liberty with some silks as little as £13pm! I actually found a design I’d been searching for for over a year here for £25pm instead of £50pm.

Liberty Emerald Bay
Liberty Silk, from Classic Textiles

Fabric World (third down from the tube) has a great selection of fabrics, including a good selection of Liberty if you love it as much as I do!

Misan is further towards the other end of the street and stocks lots of lovely designer fabrics. It is more expensive but they’ve got some amazing stuff and if you go upstairs there’s the possibility of bagging a bargain with their bolt ends or remnants.

Goldhawk Road fabric
My recent Goldhawk Road fabric haul

I hope all that gives you a better idea of what to expect and that you find it useful. Have you been to Goldhawk Road? Please let me know what your tips & recommendations are, or let me know if you’re planning a trip.